How to Make a Correction in Aadhar Card: People usually make some or the other error in filling their Aadhar Card details for the first time. Today, the UIDAI has also offered a few initiatives via their online portal, wherein the citizens can rectify anything, update or make any corrections in their Aadhar Card. The Unique Identification Authority of India has made it easier for people to get their Aadhar card updated or corrected both online and offline.
Your Aadhaar card is one of the most important identity documents in India, used for a variety of purposes like KYC verification, banking, government schemes, and more. But sometimes, errors occur during the enrolment process, leading to incorrect details on your Aadhaar.
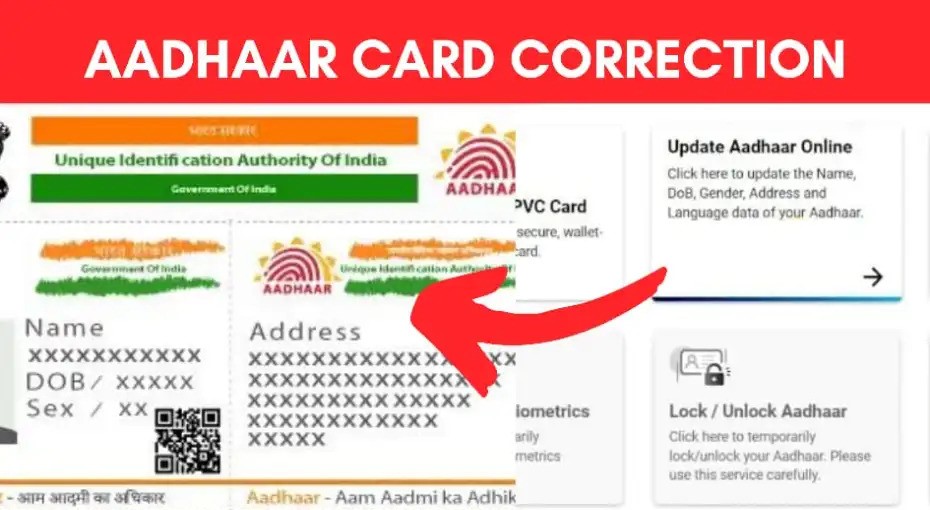
So, in case of rectifications or any corrections to any data in your Aadhar Card, please follow the below-mentioned steps below to update Aadhar card address, name, date of birth, mobile number and email ID on the Aadhar card.
How to Make a Correction in Aadhar Card
The need for Aadhar card
Aadhar card is not only required to fill income tax but also to apply for a PAN card. Just use the exclusive printed digital 12 number code as a one-point source for all your needs.
Documents required for Aadhar Card
The client must receive Aadhar card from any Aadhaar registration center in India. 18 Proof of identity and 35 proof of address are required for issuing this card. Some of these are shown below:
- Bank statement.
- Birth certificate.
- SSC Leaving certificate.
- Passport-size photo.
- Ration card.
For issuing this card, there is no age limit. For this card, the whole country is allowed.
In its judgment, the Supreme Court affirmed Aadhaar’s constitutional validity. However, for filing income tax return (ITR) and even when applying for a new PAN card, it is necessary to link your PAN with Aadhaar. You might not be able to link both if there are orthographic errors and other errors in your Aadhaar card data. There may be other reasons for updating your Aadhaar card information. Even if your Adhaar is inactive, one of those is.
If you did not use your Aadhaar for any activity, such as connecting the Aadhaar to your bank or PAN, for 3 continuous years it could become inactive, the help line of UIDAI and officials from the Adhaar registration center says. If you do, you must update the Aadhaar.
To Rectify Aadhar Card Details by Post
- You have to visit https://uidai.gov.in/images/UpdateRequestFormV5.pdf and download the “Aadhar Data Update/Correction Form”
- You have to manually fill the required details which you wish to change in your Aadhar card.
- Then, you have to get the photocopies of the documents that validate the changes requested to be made in the form.
Lastly, you need to send the form along with documents to any one of the postal addresses as mentioned below:
- Address 1: UIDAI
- Post Box No. 10,
- Chhindwara,
- Madhya Pradesh – 480001,
- India
- Address 2: UIDAI
- Post Box No. 99,
- Banjara Hills,
- Hyderabad – 500034,
- India
To Rectify Aadhar Card Details Online
- You have to first visit the Aadhar Self Service Update Portal
- If you have valid address proof ready and with you, you can click on “Update Address” else click on “Request for Address Validation Letter”
- In the new window of the site, click here enter your twelve-digit Aadhar number which you already might have
- Then you have to enter the text verification code in the box and click on Send OTP
- An OTP will then be sent to the mobile number that you have registered in UIDAI’s database.
- Enter this OTP to log in to your Aadhar account for the update.
- Click for the tick on the Address option and click on the Submit button.
- Then you have to enter your residential address mentioned in the Proof of Address (PoA) and then click on the “Submit Update Request” button.
- If you want to modify your address, click the “Modify” option.
- Now you have to tick the declaration and click on the “Proceed” button.
- You then have to select the document type you want to submit as PoA for verification and upload the scanned copy of the address proof as PDF and click on the “Submit” button.
- Then you have to click on the “Yes” button and select the BPO service provider that will verify your details and click on Submit.
- The BPO service provider has the role to inspect if the details mentioned in the form matches with the POA and forward your request to UIDAI.
- Your update request is then accepted after verification and an Acknowledgement Slip is provided to you.
This Acknowledgement Slip contains the Update Request number (URN). Once updated, you can download the updated version and get your Aadhar card print out.
Benefits of having Aadhaar card:
- If the client has connected the Aadhaar card to the saving account, then he / she will be applicable to the saving account with zero balance.
- User must obtain a RuPay card to withdraw money from ATM services.
- Getting an Aadhaar card is a golden chance that the client can get the Passport in just 10 days.
- Subsidy deposited to save the user’s account when buying the LPG cylinder and certain items such as kerosene, sugar, rice, etc.
Aadhar Card Correction Form Online {Step By Step Guide}
Aadhar Card Correction Form Online: People usually make some or the other error in filling their Aadhar Card details for the first time. But then they think that they cannot rectify it any further and they decide to just go ahead with it.
But today, the UIDAI has also offered a few initiatives via their online portal, wherein the citizens can rectify anything, update or make any corrections in their Aadhar Card. This is basically in the form of an application form which is available online. The Unique Identification Authority of India has made it easier for people to get their Aadhar card updated or corrected both online and offline.
Aadhar Card Correction Form Online
So, in case of rectifications or any corrections to any data in your Aadhar Card, please follow the below-mentioned steps below to update Aadhar card address, name, date of birth, mobile number and email ID on the Aadhar card.
To Rectify Aadhar Card Details Online:
You can follow these steps to change the details of your Aadhar card online:
- You have to first visit the Aadhar Self Service Update Portal
- If you have valid address proof ready and with you, you can click on “Update Address” else click on “Request for Address Validation Letter”
- In the new window of the site, https://ssup.uidai.gov.in/web/guest/update enter your twelve-digit Aadhar number which you already might have
- Then you have to enter the text verification code in the box and click on Send OTP
- An OTP will then be sent to the mobile number that you have registered in UIDAI’s database.
- Enter this OTP to log in to your Aadhar account for the update
- Click for the tick on the Address option and click on the Submit button
- Then you have to enter your residential address mentioned in the Proof of Address (PoA) and then click on the “Submit Update Request” button
- If you want to modify your address, click the “Modify” option
- Now you have to tick the declaration and click on the “Proceed” button
- You then have to select the document type you want to submit as PoA for verification and upload the scanned copy of the address proof as PDF and click on the “Submit” button
- Then you have to click on the “Yes” button and select the BPO service provider that will verify your details and click on Submit
- The BPO service provider has the role to inspect if the details mentioned in the form matches with the POA and forward your request to UIDAI.
- Your update request is then accepted after verification and an Acknowledgement Slip is provided to you
- This Acknowledgement Slip contains the Update Request number (URN). Once updated, you can download the updated version and get your Aadhar card print out.
Aadhar Card is one of the most important documents for an Indian citizen, and hence, it is your sole responsibility to safeguard your Aadhar card, else it might be misused by hackers who might steal your information.
POI Documents:
POI (Proof of Identity) documents containing Name & Photo:
1. Passport.
2. PAN Card.
3. Ration/ PDS Photo Card.
4. Voter ID.
5. Driving License.
6. Government Photo ID Cards/ Service photo identity card issued by PSU.
7. NREGS Job Card.
8. Photo ID issued by Recognized Educational Institution.
9. Arms License.
10. Photo Bank ATM Card.
11. Photo Credit Card.
12. Pensioner Photo Card.
13. Freedom Fighter Photo Card.
14. Kissan Photo Passbook.
15. CGHS/ ECHS Photo Card.
16. Address Card having Name and Photo issued by Department of Posts.
17. Certificate of Identity having photo issued by Gazetted Officer or Tehsildar on UIDAI standard certificate format for enrolment/ update.
18. Disability ID Card/ handicapped medical certificate issued by the respective State/ UT Governments/Administrations.
19. Bhamashah Card.
20. Certificate from Superintendent/ Warden/ Matron/ Head of Institution of recognized shelter homes or orphanages etc. on UIDAI standard certificate format for enrolment/update.
21. Certificate of Identity having photo issued by MP or MLA or MLC or Municipal Councilor on UIDAI standard certificate format for enrolment/ update.
22. Certificate of Identity having photo issued by Village Panchayat Head or Mukhiya or its equivalent authority (for rural areas) on UIDAI standard certificate format for enrolment/ update.
23. Gazette notification for name change.
24. Marriage certificate with photograph.
25. RSBY Card.
26. SSLC book having candidates photograph.
27. ST/ SC/ OBC certificate with photograph.
28. School Leaving Certificate (SLC)/ School Transfer Certificate (TC), containing name and photograph.
29. Extract of School Records issued by Head of School containing name and photograph.
30. Bank Pass Book having name and photograph.
31. Certificate of Identity containing name and photo issued by Recognized Educational Institution signed by Head of Institute on UIDAI standard certificate format for enrolment/ update.
32. Certificate of identity containing Name, DOB and Photograph issued by Employees’ Provident Fund Organisation (EPFO) on UIDAI standard certificate format for enrolment/ update.
POR Documents:
POR (Proof of Relationship) documents containing:
1. PDS Card.
2. MNREGA Job Card.
3. CGHS/ State Government/ ECHS/ ESIC Medical card.
4. Pension Card.
5. Army Canteen Card.
6. Passport.
7. Birth Certificate issued by Registrar of Birth, Municipal Corporation and other notified local government bodies like Taluk, Tehsil etc.
8. Any other Central/ State government issued family entitlement document.
9. Marriage Certificate issued by the government.
10. Address card having name and photo issued by the Department of Posts.
11. Bhamashah card.
12. Discharge card/ slip issued by Government hospitals for the birth of a child.
13. Certificate of Identify having photo issued by MP or MLA or MLC or Municipal Councillor or Gazetted Officer on UIDAI standard certificate format for enrolment/update.
14. Certificate of Identity having photo and relationship with HoF issued by Village Panchayat Head or Mukhiya or its equivalent authority (for rural areas) on UIDAI standard certificate format for enrolment/ update.
Why Correct Your Aadhaar Details?
Your Aadhaar card needs to have accurate information to avoid discrepancies in services where it is required. Some common reasons for corrections include:
- Name mismatch
- Wrong date of birth
- Address error
- Incorrect mobile number or email ID
- Spelling mistakes
If you find any discrepancies in your Aadhaar details, you must correct them to ensure smooth access to government services, subsidies, and other essential facilities.
Types of Corrections in Aadhaar Card
The following details can be updated or corrected in your Aadhaar:
- Personal Information:
- Name
- Date of Birth
- Gender
- Address Details:
- Permanent Address
- Residential Address
- Biometric Data:
- Fingerprint correction
- Iris scan correction
- Mobile Number & Email Address (if not registered initially)
Note: If you are looking to update the photo or change the biometric information, you need to visit an Aadhaar Seva Kendra (ASK) or an enrollment center.
Steps to Make a Correction in Aadhaar Card
Here’s the step-by-step guide to making corrections to your Aadhaar card:
Step 1: Visit the UIDAI Official Website
To start the correction process online, you need to visit the official UIDAI website:
https://uidai.gov.in
- On the homepage, navigate to the “Update Aadhaar” section under the “Aadhaar Services” tab.
- Click on the “Update Aadhaar Online” link.
Step 2: Choose the Correction Option
Once you click on the “Update Aadhaar Online” link, you will be redirected to the Aadhaar Self-Service Update Portal (SSUP).
- Select the type of correction you need to make. You can choose from:
- Update Demographic Details (for Name, Address, Date of Birth, etc.)
- Update Biometric Details (for Fingerprints, Iris, etc.)
Step 3: Enter Your Aadhaar Details
- Enter Aadhaar Number:
Enter your Aadhaar number (12-digit number) to proceed. - Enter Security Code (Captcha):
Complete the CAPTCHA verification to prove that you are not a bot.
Step 4: Verify with OTP
- An OTP (One-Time Password) will be sent to your registered mobile number.
- Enter the OTP in the box provided on the portal.
Step 5: Update the Correct Details
Once you have logged in, you will be taken to a page where you can update your details.
- For demographic updates (such as name, address, gender, etc.), enter the corrected information.
- For address updates, you will need to upload a valid document that proves your new address (like an electricity bill, bank statement, etc.).
- For biometric updates, you will be required to visit an Aadhaar Enrollment Center since biometric data cannot be updated online.
Step 6: Review and Submit
- After entering the necessary details, make sure to review the information for any further errors.
- Click on Submit to finalize the correction request.
Step 7: Acknowledgement Slip
Once your correction request is submitted, you will receive an Acknowledgement Slip with an Update Request Number (URN).
Keep this slip safe, as it will be used for tracking your update status.
Step 8: Track the Status of Your Update
To check the status of your Aadhaar correction request, follow these steps:
- Visit the UIDAI website and go to the “Check Aadhaar Status” page.
- Enter your URN (Update Request Number) and Aadhaar Number.
- Click Check Status to see the progress of your update.
You will also be notified by SMS once your update has been processed and your corrected Aadhaar is ready.
Step 9: Download Updated Aadhaar
Once your correction is approved, you can download your updated Aadhaar card. Follow these steps:
- Go to the UIDAI portal.
- Click on Download Aadhaar under the “Aadhaar Services” tab.
- Enter your Aadhaar number and the OTP sent to your mobile.
- Download your corrected Aadhaar card in PDF format.
The PDF will be password-protected. The password is usually the first four letters of your name (in uppercase) followed by your year of birth.
Offline Method for Aadhaar Correction
If you are unable to make changes online or prefer doing it offline, you can visit an Aadhaar Seva Kendra (ASK) or an Aadhaar Enrollment Center. Here’s how:
- Locate your nearest Aadhaar Seva Kendra using the UIDAI website.
- Visit the center with your original documents for verification.
- Request the correction of details, and submit a correction form.
- The officials will verify your documents, and the changes will be made after a few days.